
Systems Page
Connecting systems to your privacy center helps you manage consumer requests to view, edit or delete consumer data and preferences.
Click Systems in the left navigation bar to open the Systems page, which enables you to connect to the systems where you store consumer data. You can connect any system in your enterprise.
Some systems support automated processing, executing requests immediately with no manual processing required. These systems are marked as connector type Auto Scanning. See Autoscan Systems for a full listing of systems that support automation.
Systems that do not support automation require manual processing to retrieve and update data and are marked as connector type Workflow.
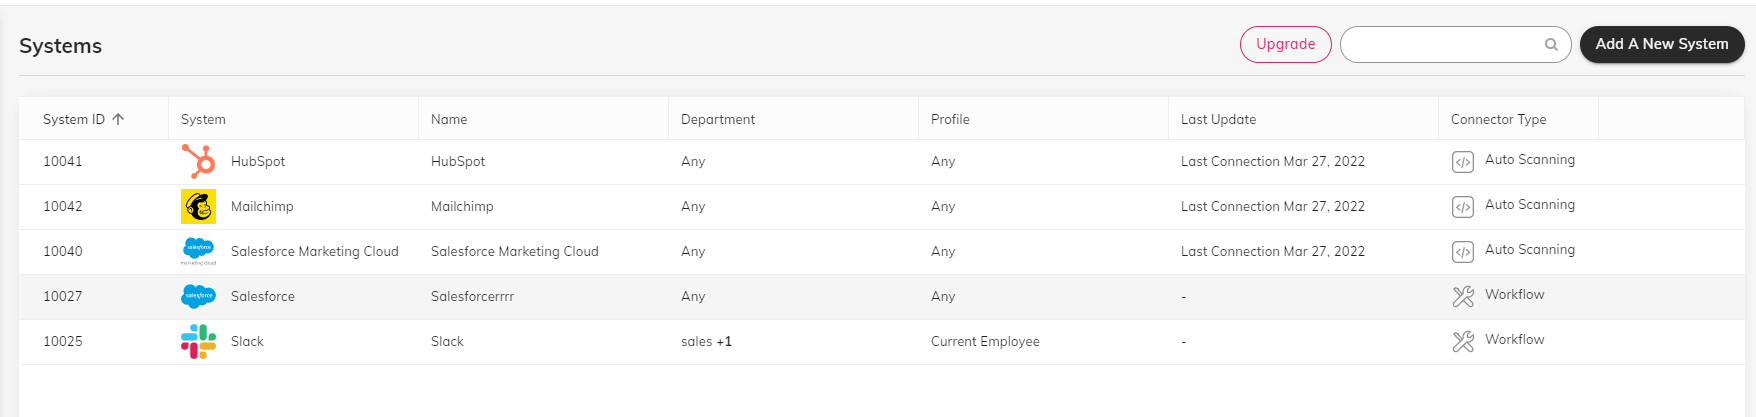
This table displays the following information for each connected system:
| Column | Description |
|---|---|
| System ID | Unique ID assigned automatically when you connect the system. |
| System | The type of data repository. |
| Name | The name you assigned when you connected the system. |
| Department | Business unit that uses this system, selected from a list configured in Settings. |
| Profile | Type of consumer whose data is stored in this system, selected from a list configured in Settings. |
| Last Update | Date stamp of the most recent connection to this system (Auto Scanning systems only). |
| Connector Type | Auto Scanning or Workflow - see description above. |
Create a New Connection
- Open the New System page
In the top-right corner of the Systems page, click Add A New System.
- Select System Type
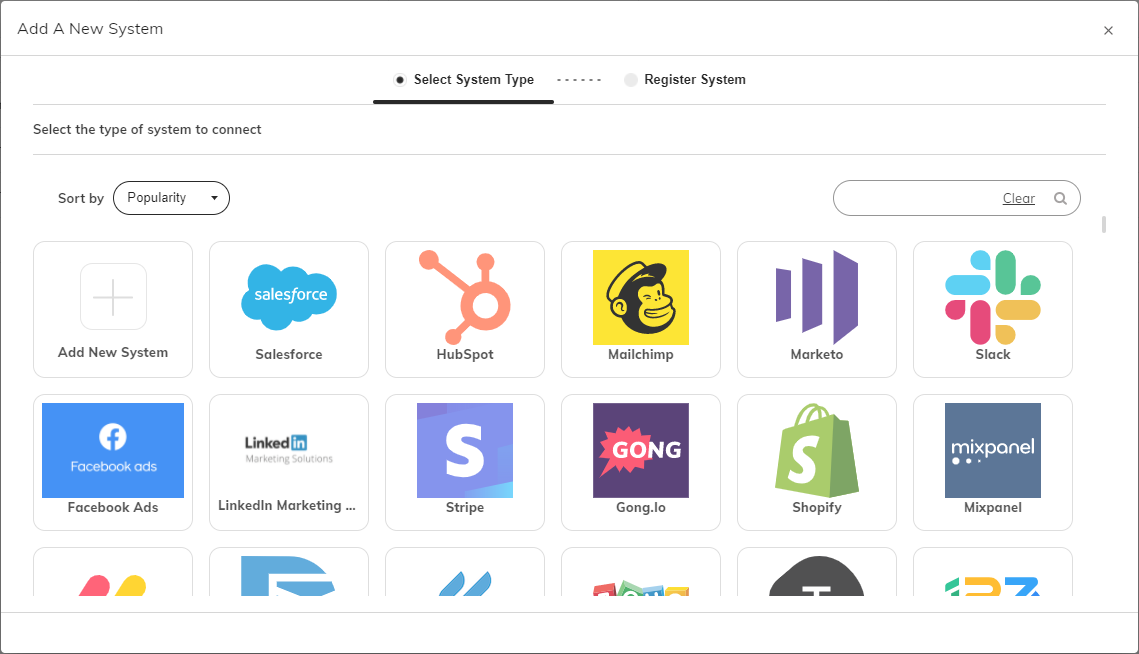
On the Select System Type tab, you can select from a list of supported system types or add a new one. You can sort the page using the filters in the upper left by popularity or alphabetically, or search for a system using the search bar in the upper left. Hover over a system card to see if the system supports automated or manual processing.
Add a New System Type:
If the system type you wish to connect does not appear, click Add New System to create a new system connection.
Fill in the following:
Type - select the system type. Scroll to the bottom of the dropdown list and click + Add New Value in the dropdown if your system type does not appear, or scroll to the top of the dropdown list to search.
System Name - a name you assign to identify the system.
Department, Profile - select from the values you created in Settings.
When your entries are complete, click Add System. Your new system will now appear on the Systems page. - Register System
After selecting the system type, you will be prompted to register the system by filling in System Name (modify the default value to create a unique name), Department and Profile.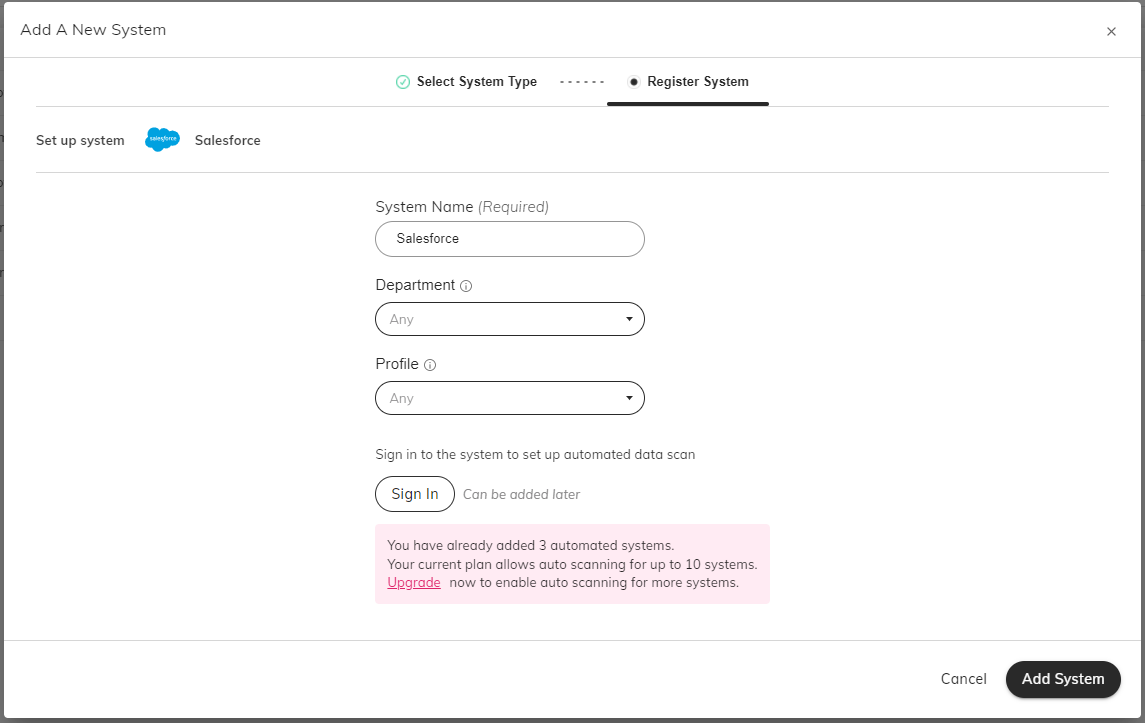
- Sign In (Auto Scanning only)
If the system supports auto-scanning, the option to Sign In appears on this page. Click the Sign In button to open a window to enter credentials that log in to the system. The specific parameters depend on the system type.
After filling in the credentials, click the login button to run a connection test to confirm a successful connection. - Finish
Click Add System in the bottom right corner to finalize the setup and return to the Systems page.
Edit Connection
Click on a system in the Systems page to edit the connection settings. System ID and System Type cannot be modified for existing systems. You can modify the Unique System Name, Department, Profile, and Login Credentials, and you can delete the system connection by clicking Delete System in the upper right corner.
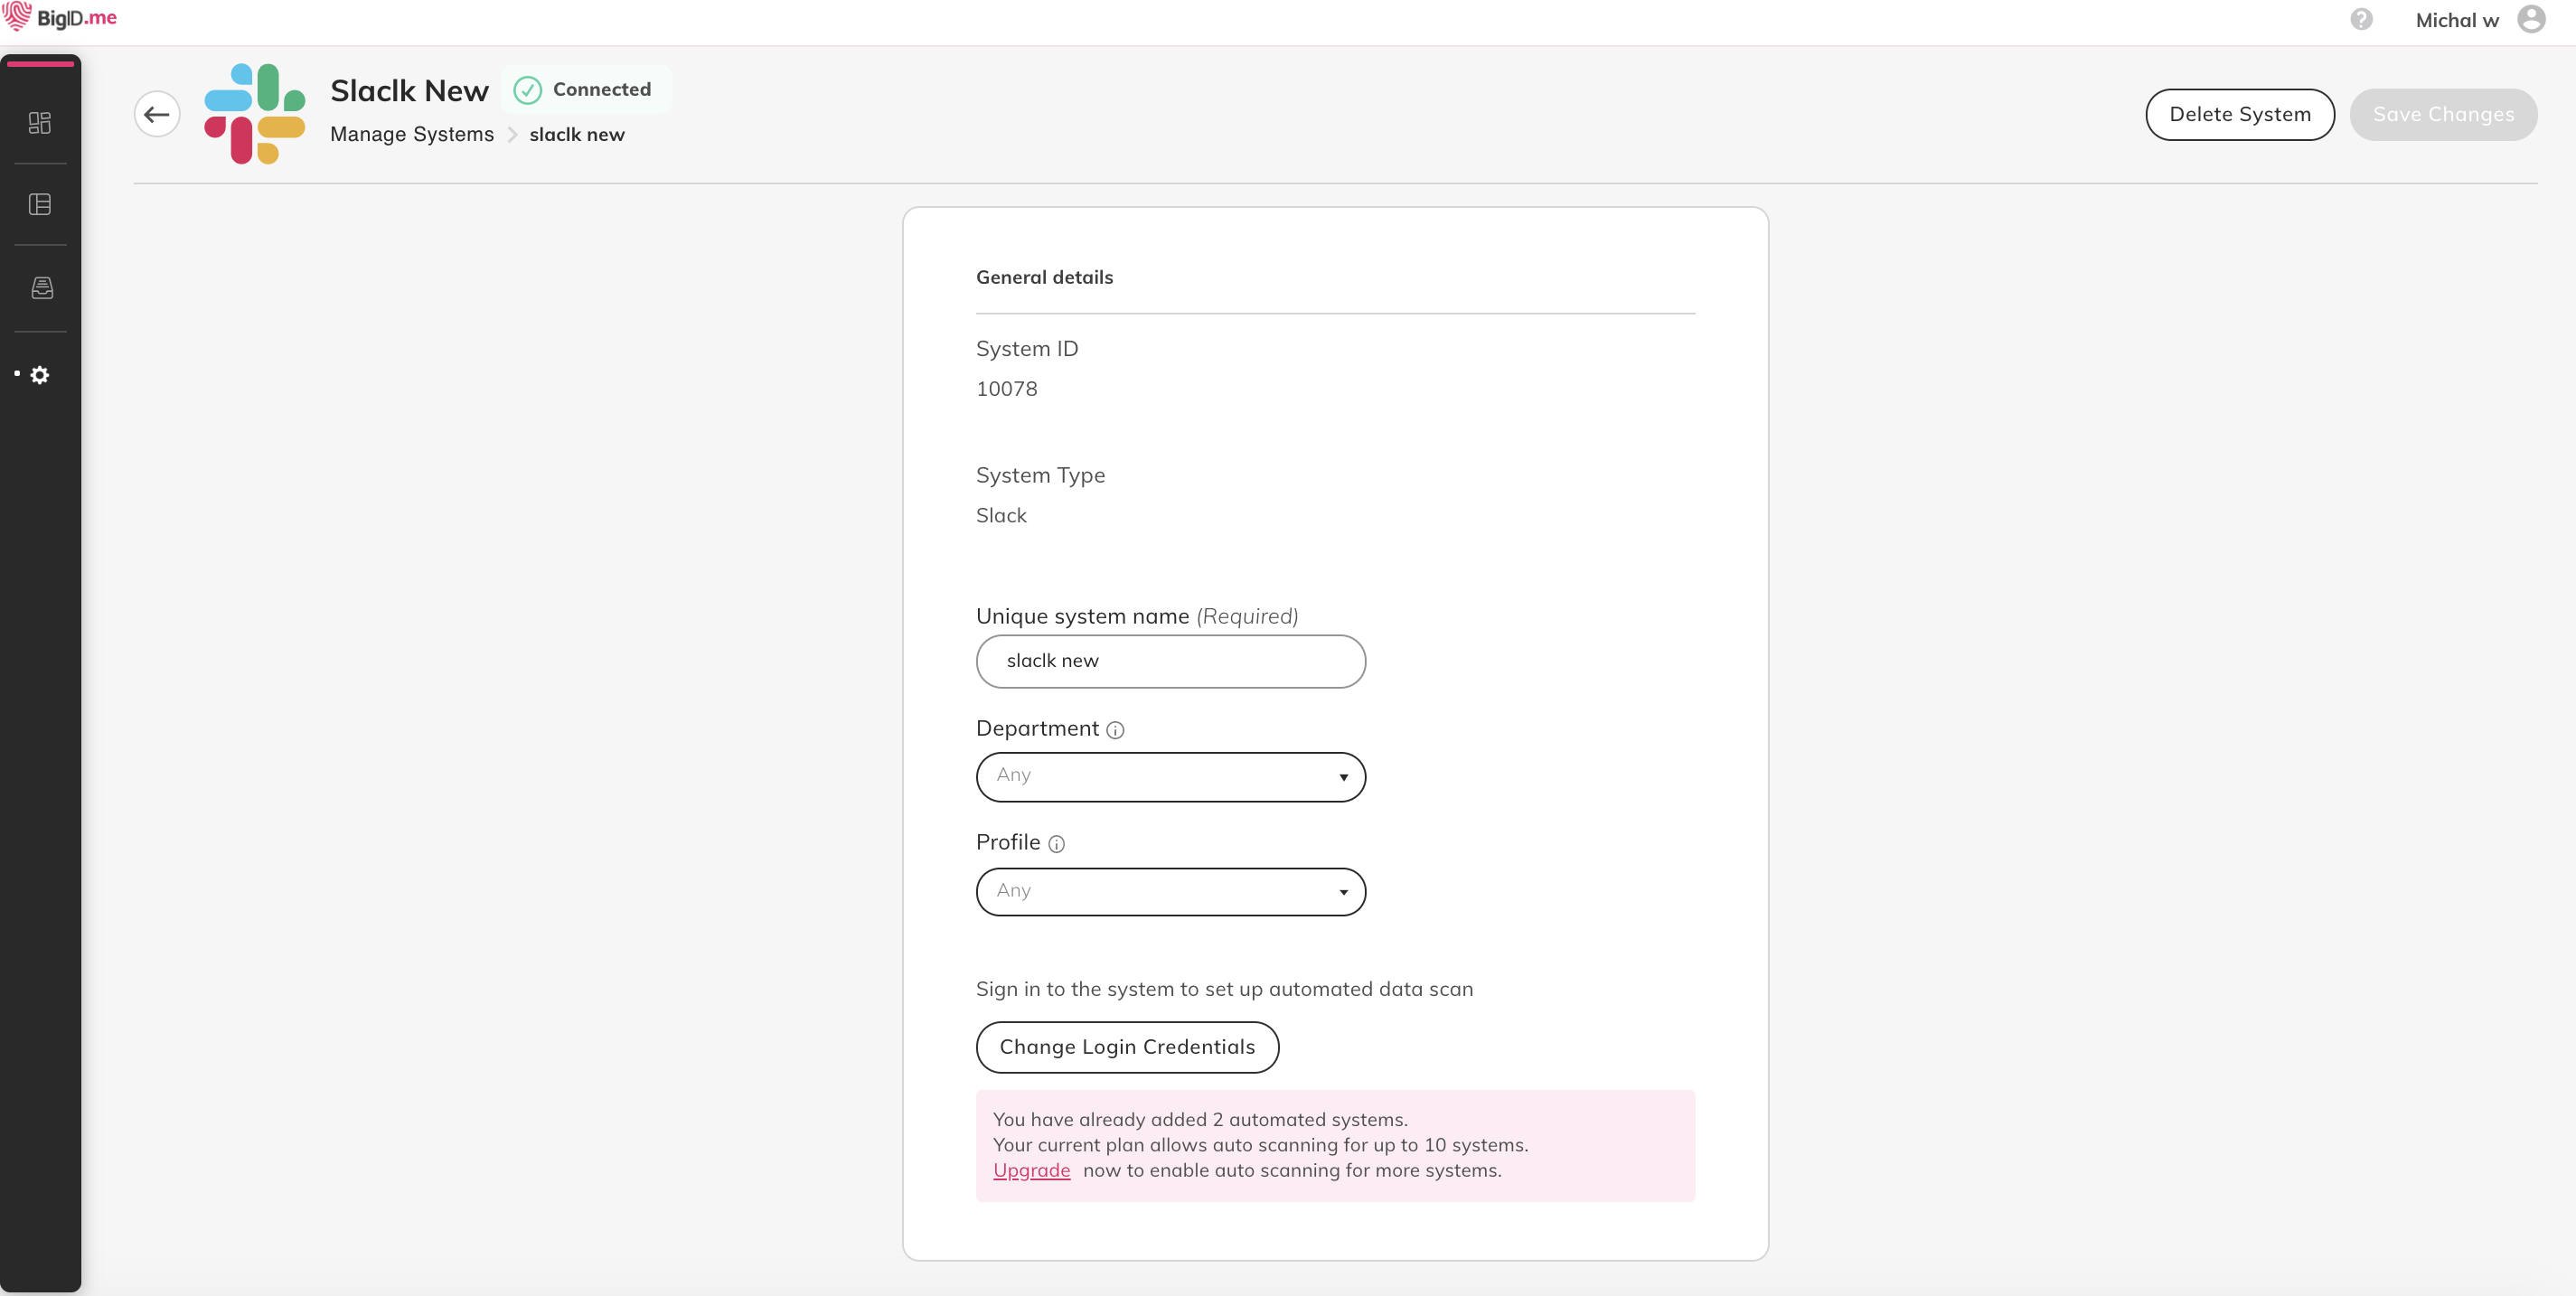
Save your changes by clicking the button in the upper right corner, and return to the Systems page by clicking the back arrow in the upper left corner.
Comments
0 comments
Please sign in to leave a comment.